
![]() We typically write about WordPress and all things web. But the past few weeks, we’ve been working on a very special week.
We typically write about WordPress and all things web. But the past few weeks, we’ve been working on a very special week.
And this coming weekend, I’ll be showing this project with my collaborator, Eleas Kostis – artist extraordinaire – and owner of Praxis Design at Maker Faire! Woohoo!
Below is some initial documentation for the project. Here’s the Project Space on Eleas’ site.
http://www.praxisdesigns.net/projects/maker-faire-collaboration/
To get a sense of what the sculptures are looking like, here’s a photo of what we’re working on (check out Flickr for more photos)
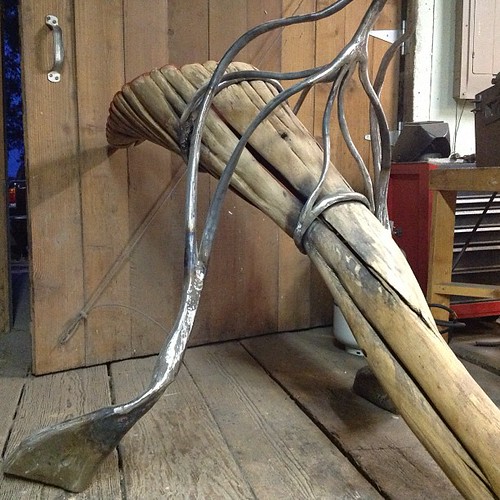
So – what does our project “do” ?
Well – as of now, it’s a interactive wood.metal network of sculptures. As you approach any one of the sculptures, the lights on the sculpture change.
Here’s a quick video on what things are looking like so far
We’ve made an effort to document things as we go, so below is some documentation on how the electronics part of things work.
ELECTRONICS & CODE
To start, we are working with Arduino’s, some LED strip lights, a PING Sensor, and some XBEE’s.
To get going, we downloaded the latest versions of Processing (http://processing.org/download/) and Arduino (http://arduino.cc/en/main/software).
Once I had the latest versions running on my computer, I was able to get hacking and coding. I pulled down some test code just to try getting code from my computer to by Arduino board. For the Arduino side of things, I’m using the Arduino Duemilanove.

Initially, I had some issues getting the very basic step of getting code onto my Arduino going. I typed in the error message I got when I compiled code into Google and came across many resources. This particular resource was the best : http://www.arduino.cc/en/Guide/Troubleshooting#upload
It turns out that I had an old version of Processing and Arduino already running. So I had to make some changes.
From the page :
Make sure you have the right item selected in the Tools > Board menu. If you have an Arduino Uno, you’ll need to choose it. Also, newer Arduino Duemilanove boards come with an ATmega328, while older ones have an ATmega168. To check, read the text on the microcontroller (the larger chip) on your Arduino board.
Once I updated my software, and made the changes above, I was able to get coding.
SOME OF MY ELECTRONICS
PING))) Ultrasonic Distance Sensor – to detect distance
I tried to pull the code up from the Parallax site, but it just didn’t work quite right :
http://learn.parallax.com/kickstart/28015
So then I found this code, which DID work (thanks to Tom Igoe)
http://www.arduino.cc/en/Tutorial/Ping
I’ve since written lots of code.
And I also started collecting Local Resources.
BAY AREA RESOURCES
Currently, I’m based in the Bay Area, so I wanted to compile some useful links to Bay Area hackers and hacker spaces –
- https://www.noisebridge.net/wiki/Noisebridge
- http://www.cornfieldelectronics.com/
- http://www.srl.org/
- http://www.meetup.com/makesf/
- http://lovetech.org/
While working on things, I started looking for other people working with the LED strip we’re working with. I found this fun video, and it showcases the Radioshack LED Strips we’re using :
http://lucyindustrial.com/post/34813957359/more-lighting-effects-this-time-they-react-to
I’ll definitely be posting more resources as we go – in the meantime, if you’ve got any questions or curiosities, post them in the comments below!